thewebsitemakers

Add a Golden Glow to Your Garden with These Easy-Care Plants

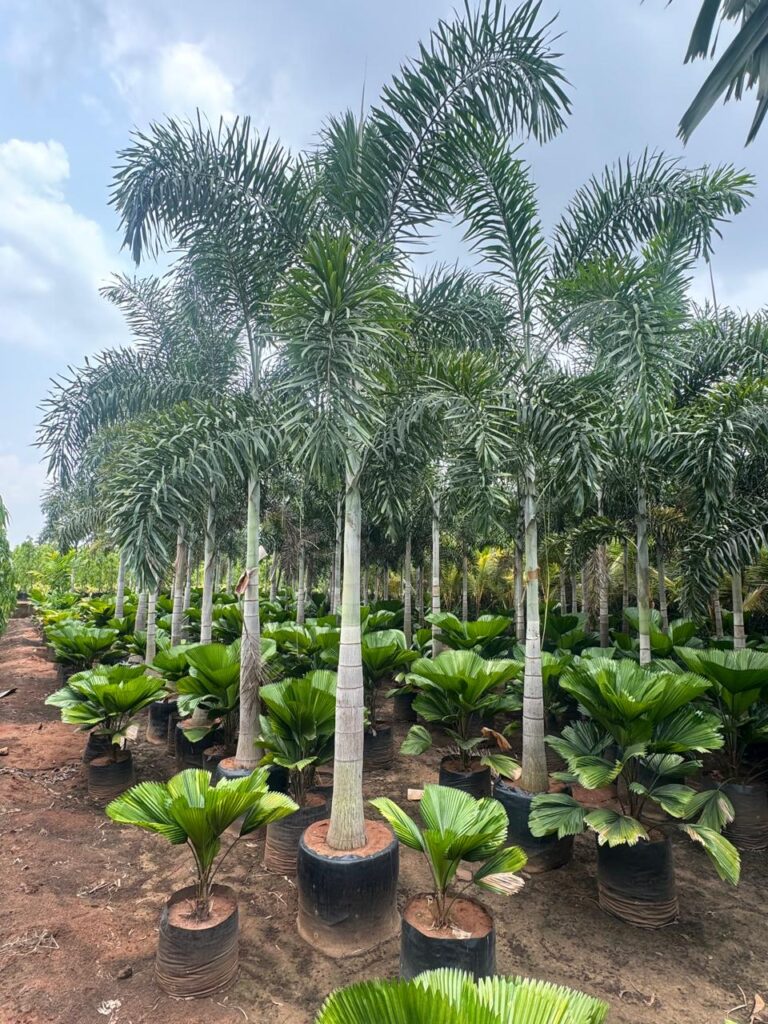
Understanding the Appeal of Golden Glow PlantsGolden Glow plants bring warmth happiness and natural brilliance to any garden space with their rich yellow and golden tones that instantly uplift the surroundings. These plants are loved not only for their bright cheerful appearance but also for their ability to thrive with minimal care making them perfect for both beginners and experienced gardeners. A garden filled with Golden Glow plants feels welcoming energetic and alive throughout the year while requiring far less effort than many traditional flowering varieties. Why Golden Glow Plants Are Perfect for Easy-Care GardensGolden Glow plants are known for their strong adaptability and low-maintenance nature which makes them ideal for modern lifestyles. They tolerate heat perform well in sunny locations and continue blooming with limited watering once established. These qualities make Golden Glow plants an excellent choice for home gardens terrace gardens and landscaped commercial spaces. Their long blooming cycles and resilient growth ensure consistent beauty without constant attention. Choosing the Right Golden Glow Plants for Your GardenSelecting the right Golden Glow plants depends on your garden size sunlight exposure and design preference. Flowering varieties with golden yellow blooms work beautifully as borders focal points or fillers. Shrub-type Golden Glow plants add structure and depth while compact varieties suit pots and balconies perfectly. When chosen thoughtfully these plants create harmony and visual balance while maintaining the golden theme across your garden. Step 1: Selecting the Ideal LocationGolden Glow plants thrive best in locations that receive plenty of sunlight. Choose areas that get at least six to eight hours of direct sunlight daily to encourage healthy growth and abundant blooms. These plants also adapt well to semi-open spaces with good airflow which helps prevent fungal issues. Whether planted in garden beds or containers proper placement plays a key role in maintaining their vibrant golden color. Step 2: Preparing Soil for Healthy GrowthHealthy soil is the foundation of thriving Golden Glow plants. Well-drained loamy or sandy soil enriched with organic compost works best. Avoid heavy clay soils that retain excess moisture as Golden Glow plants prefer soil that drains easily. Before planting loosen the soil and mix in natural compost or vermicompost to support strong root development and long-lasting blooms. Step 3: Planting and Initial CarePlant Golden Glow saplings during cooler parts of the day such as early morning or late evening. Dig holes wide enough to accommodate the roots comfortably and gently firm the soil around the base after planting. Water immediately to help the roots settle. During the initial growth phase maintain moderate moisture without overwatering. Once established these plants require significantly less water. Step 4: Watering the Right WayGolden Glow plants are naturally drought tolerant which makes watering simple and efficient. Water deeply but infrequently allowing the soil to dry slightly between watering sessions. Overwatering can weaken roots and reduce flowering. Early morning watering is ideal as it allows moisture absorption before the heat of the day. In container gardening ensure proper drainage to prevent water buildup. Step 5: Feeding for Continuous BloomingThese easy-care Golden Glow plants require minimal feeding. A light application of organic fertilizer or compost every six to eight weeks during the growing season is sufficient. Avoid excessive fertilization as it can promote excessive leaf growth at the expense of flowers. Balanced nutrition helps maintain vibrant color and encourages steady blooming. Step 6: Pruning and MaintenanceRegular light pruning keeps Golden Glow plants looking fresh and encourages new blooms. Remove faded flowers dry stems and yellowing leaves to redirect energy toward healthy growth. Seasonal pruning helps maintain shape and prevents overcrowding. Use clean sharp tools to avoid damage and ensure the plant remains disease free. Designing Your Garden with Golden Glow PlantsGolden Glow plants pair beautifully with green foliage white flowers and soft purple tones creating visually pleasing contrasts. Use them as borders along walkways to guide movement or cluster them in garden corners for a bold impact. In terrace or balcony gardens Golden Glow plants in decorative pots create cheerful focal points. Their warm color complements both modern and traditional garden designs effortlessly. Golden Glow Plants for Sustainable GardeningOne of the biggest advantages of Golden Glow plants is their contribution to sustainable gardening. Their low water requirement supports water conservation while their hardy nature reduces the need for chemical treatments. These plants attract beneficial pollinators which enhances biodiversity and promotes a healthier garden ecosystem. Choosing Golden Glow plants means creating beauty responsibly. Why Bhoomi Nursery Recommends Golden Glow PlantsAt Bhoomi Nursery we believe that beautiful gardens should also be easy to maintain. Golden Glow plants align perfectly with this philosophy by offering vibrant color resilience and simplicity. Our carefully nurtured Golden Glow plants are grown to adapt well to Indian climates and varied landscapes. With expert guidance and premium plant quality Bhoomi Nursery helps gardeners create glowing green spaces that last. Conclusion: Bring Effortless Brilliance to Your GardenGolden Glow plants are the perfect choice for anyone looking to add warmth brightness and elegance to their garden without complicated care routines. Their adaptability minimal maintenance and long-lasting blooms make them ideal for every type of garden. With thoughtful placement simple care and support from Bhoomi Nursery you can enjoy a garden that truly shines with golden beauty all year round.

Add a Golden Glow to Your Garden with These Easy-Care Plants Read More »

Designing Beautiful Spaces with Starlight Succulent Plants

The Unique Charm of Starlight Succulent PlantsStarlight Succulent plants are loved for their soft glow-like appearance, sculptural form, and calming presence that instantly elevates any space. With their star-shaped patterns and subtle tones, these succulents bring a refined elegance that works beautifully in both modern and traditional environments. What makes Starlight Succulent plants special is their ability to look striking without overpowering the space, making them perfect design elements for homes, offices, and landscaped areas. Their natural symmetry and resilience allow designers and gardeners to create visually appealing spaces with minimal effort. Why Starlight Succulent Plants Are Ideal for Space DesignWhen designing beautiful spaces, plant selection matters as much as layout and color. Starlight Succulent plants are ideal because they are low maintenance, drought tolerant, and visually consistent throughout the year. They thrive in containers, ground arrangements, and mixed plant displays, offering flexibility in design. Their calm aesthetic helps create peaceful environments, while their structured form adds depth and balance to green spaces. For beginners and experienced gardeners alike, Starlight Succulent plants offer beauty without complexity. Choosing the Right Location for Starlight Succulent PlantsPlacement plays a key role in showcasing Starlight Succulent plants effectively. These plants perform best in areas that receive bright indirect sunlight or gentle morning sun. Indoor spaces near windows, balconies, or well-lit corners are excellent choices. Outdoors, they thrive in patios, terraces, and garden beds with partial sun. Avoid overly shaded areas, as insufficient light can reduce their compact form and visual appeal. Thoughtful placement ensures the Starlight Succulent plant remains vibrant and well-shaped. Designing Indoor Spaces with Starlight Succulent PlantsStarlight Succulent plants are perfect for indoor styling because of their compact size and elegant look. Use them on coffee tables, shelves, work desks, and window sills to add natural warmth without clutter. Neutral-colored pots highlight their soft tones, while ceramic or concrete planters enhance modern interiors. Grouping two or three Starlight Succulent plants together creates a balanced focal point that feels intentional and calming. These plants also pair well with minimalist décor, making them a favorite for contemporary homes. Using Starlight Succulent Plants in Outdoor LandscapesIn outdoor settings, Starlight Succulent plants add structure and texture to landscapes. They work beautifully in rock gardens, pathway borders, and low-water garden designs. When combined with gravel, stones, or sand, they create a clean and sophisticated desert-inspired look. These plants also complement flowering species by offering contrast through their form and foliage. In terrace gardens, they perform exceptionally well in containers, creating stylish green corners that require very little maintenance. Step 1: Selecting the Right Containers and PlantersChoosing the right container enhances the visual impact of Starlight Succulent plants. Select pots with proper drainage to protect the roots from excess moisture. Shallow, wide planters work well for showcasing their shape, while tall pots add a vertical design element. Earthy tones, whites, and soft pastels pair beautifully with the plant’s natural look. Containers made from clay, ceramic, or stone support both aesthetics and plant health. Step 2: Creating a Balanced Plant ArrangementDesigning with Starlight Succulent plants is about balance and proportion. Combine them with plants of varying heights and textures for a layered look. Pairing them with trailing plants or compact shrubs creates visual interest without overcrowding. Leave enough space between plants to maintain airflow and highlight each plant’s shape. Balanced arrangements ensure the Starlight Succulent plant stands out while contributing harmoniously to the overall design. Step 3: Maintaining Visual Harmony with Proper CareHealthy plants always look better in designed spaces. Starlight Succulent plants require well-drained soil and controlled watering. Water only when the soil is completely dry, as overwatering can affect both health and appearance. Keep leaves clean and free from dust, especially for indoor plants, to maintain their natural sheen. Minimal pruning helps retain their shape and keeps the design looking fresh and intentional. Color Pairing and Design Themes with Starlight Succulent PlantsStarlight Succulent plants fit effortlessly into many design themes. They complement neutral palettes, earthy tones, and soft pastels, making them ideal for calm and modern spaces. In outdoor designs, they pair well with natural stone, wooden elements, and gravel pathways. For a bold look, contrast them with darker planters or vibrant flowering plants. Their adaptable appearance allows designers to experiment while maintaining a cohesive look. Why Bhoomi Nursery Recommends Starlight Succulent PlantsAt Bhoomi Nursery, we focus on plants that combine beauty, durability, and design flexibility. The Starlight Succulent plant is one of our recommended choices for creating elegant, low-maintenance spaces. Our nursery-grown plants are carefully nurtured to ensure strong roots, healthy growth, and long-lasting visual appeal. Whether you are styling a home interior, office environment, or outdoor landscape, Bhoomi Nursery provides expert guidance and premium-quality Starlight Succulent plants suited for Indian conditions. Conclusion: Elevating Spaces with Starlight Succulent PlantsDesigning beautiful spaces with Starlight Succulent plants is both simple and rewarding. Their graceful form, low care requirements, and versatile design potential make them ideal for modern living. With thoughtful placement, balanced arrangements, and basic care, these plants transform ordinary spaces into calm, stylish environments. By choosing Bhoomi Nursery, you invest in quality plants that bring lasting beauty and effortless elegance to every corner of your space.

Designing Beautiful Spaces with Starlight Succulent Plants Read More »

Transform Your Garden with Golden Glow Flowers: A Complete Guide for Beginners

Discovering the Radiance of Golden Glow FlowersGolden Glow flowers are nature’s way of adding sunshine to your garden all year round. Their warm golden tones and lush petals brighten every corner, turning ordinary spaces into vibrant landscapes. These hardy, low-maintenance blooms thrive in various conditions, making them perfect for beginners who want instant color with minimal effort. Known for their long-lasting blossoms and ability to attract pollinators, Golden Glow flowers are a symbol of energy, optimism, and natural beauty. Whether used as borders, clusters, or statement plants, they instantly elevate the mood of any garden. Why Choose Golden Glow Flowers for Your GardenGolden Glow flowers combine easy care with stunning visual appeal. They flourish in full sunlight and tolerate heat exceptionally well, making them ideal for tropical and semi-arid climates. Their deep golden blooms stand out against green foliage, offering a balanced color contrast that catches every eye. These flowers bloom generously and require minimal watering once established, making them an eco-friendly choice. Perfect for home gardens, terraces, and landscaped lawns, Golden Glow flowers embody the balance between beauty and sustainability. Step 1: Selecting the Right Spot for PlantingChoosing the right location is essential for healthy growth. Golden Glow flowers love sunlight, so pick a spot that receives at least six to eight hours of direct light daily. They adapt well to garden beds, pots, and decorative planters. Ensure the space has good air circulation to keep the foliage fresh and prevent fungal growth. When planting near other species, leave enough space between each plant to allow healthy root expansion and better airflow. Step 2: Preparing the Ideal Soil MixGolden Glow plants prefer well-drained, fertile soil that retains enough moisture without staying soggy. Loamy or sandy soil enriched with organic compost works best. Mix in natural manure or vermicompost before planting to supply essential nutrients. Avoid heavy clay soil, as it traps excess water and leads to root rot. A slightly acidic to neutral soil pH between 6.0 and 7.0 supports optimal growth and vibrant flowering. Before planting, loosen the topsoil to promote oxygen flow and stronger root development. Step 3: Planting and Initial WateringPlant Golden Glow seedlings or cuttings during the early morning or late evening to reduce transplant shock. Dig small holes twice the width of the root ball and position each plant gently. After covering with soil, press lightly to remove air pockets. Water immediately after planting to help roots settle. For the first few weeks, keep the soil consistently moist but never waterlogged. Once the plants establish, reduce watering frequency and allow the topsoil to dry slightly between sessions. Step 4: Sunlight and Temperature RequirementsGolden Glow flowers thrive in full sunlight, which enhances their color and encourages abundant blooms. They tolerate warm temperatures exceptionally well, making them suitable for most Indian climates. In cooler regions, they can also handle partial shade, though flowering may reduce slightly. Ensure they receive morning sunlight for at least five hours, as this strengthens stems and promotes healthy buds. Avoid keeping them in completely shaded areas, as it leads to leggy growth and fewer flowers. Step 5: Fertilization for Healthy GrowthFeed your Golden Glow plants with a balanced organic fertilizer once every two months during the growing season. Use compost, cow dung, or a mild liquid fertilizer to provide consistent nutrition. Avoid over-fertilizing, as this encourages leafy growth at the cost of flowering. A light top-dressing of compost before the blooming season enhances color intensity and increases bloom longevity. Regular feeding ensures lush foliage and continuous flowering throughout the year. Step 6: Pruning and MaintenancePruning keeps your Golden Glow plants neat and encourages new blooms. Trim dead or faded flowers regularly to stimulate fresh buds. Remove any yellowing leaves or dry stems to maintain plant health. Early spring is the best time for a light trim that shapes the plant without stressing it. Regular maintenance not only keeps the garden tidy but also extends the flowering season. Always use clean, sharp scissors to avoid damaging healthy tissue or spreading disease. Step 7: Watering and Mulching PracticesWater your Golden Glow plants early in the morning to minimize evaporation and allow proper absorption. In hot months, water deeply twice a week, depending on the soil’s dryness. Reduce watering during cooler months to prevent root stress. Adding mulch around the base helps retain soil moisture, control weeds, and regulate temperature. Organic mulch such as dry leaves, bark chips, or straw works perfectly while enhancing the garden’s aesthetic appeal. Step 8: Pest and Disease PreventionGolden Glow plants are generally resilient but may attract common pests like aphids or whiteflies. Regularly inspect the underside of leaves and treat any infestations promptly with neem oil or mild organic sprays. Ensure proper spacing and airflow between plants to reduce fungal risks. Avoid overwatering, as damp soil encourages root and leaf diseases. A little preventive care ensures your plants remain healthy, vigorous, and bloom-ready all year long. Designing with Golden Glow FlowersGolden Glow flowers complement almost every garden style. Combine them with white or purple blooms for contrast or with green shrubs for a natural, layered look. They make excellent borders, fill corners beautifully, and add height and warmth to mixed beds. For container gardens, pair them with trailing plants or succulents for a balanced composition. Their radiant color and gentle fragrance create a welcoming environment that enhances any outdoor or indoor space. Why Bhoomi Nursery Recommends Golden Glow FlowersAt Bhoomi Nursery, we believe every garden deserves plants that bring effortless beauty and long-lasting charm. The Golden Glow flower is one of our top recommendations for gardeners who want vibrant color with easy care. Our nursery offers healthy, nursery-grown Golden Glow plants that adapt seamlessly to diverse climates. With expert guidance and premium quality plants, Bhoomi Nursery helps you create a glowing, picturesque garden that truly stands out. Conclusion: A Golden Touch for Every GardenGolden Glow flowers are the perfect blend of elegance, durability, and natural brilliance. Their warm hues, minimal care needs, and strong adaptability make them

Transform Your Garden with Golden Glow Flowers: A Complete Guide for Beginners Read More »

How to Care for Silver Mist Plants: Easy Tips for Every Gardener

Understanding the Beauty of Silver Mist PlantsSilver Mist plants are admired for their delicate silvery foliage and natural elegance that brighten any garden. Known for their fine texture and subtle sheen, these plants bring contrast and sophistication to both outdoor landscapes and indoor spaces. The cool silver hue complements flowering plants beautifully, creating a calm, balanced aesthetic. Whether used as a border, ground cover, or container plant, the Silver Mist adds a unique charm with minimal care. For gardeners seeking style with simplicity, these plants offer the perfect blend of grace and endurance. Why Silver Mist Plants Are Perfect for All GardensThe main appeal of Silver Mist plants lies in their resilience and adaptability. They thrive in various soil conditions and tolerate heat, drought, and full sunlight with ease. Their silvery leaves reflect sunlight, helping the plant retain moisture and stay fresh even during dry spells. These plants are ideal for gardeners who prefer low-maintenance, high-impact greenery. With their soft color and versatile nature, they fit perfectly into modern, traditional, or tropical garden themes. Step 1: Choose the Right Spot for PlantingLocation plays a crucial role in growing healthy Silver Mist plants. Select a spot that receives at least six hours of sunlight each day. While they tolerate partial shade, full sun ensures the richest color and healthiest growth. If you are planting in containers, place them near windows or balconies that get bright light. Avoid heavily shaded areas, as limited sunlight can dull the plant’s signature silver hue. Step 2: Prepare the Soil for Strong RootsSilver Mist plants prefer well-drained, sandy, or loamy soil. Before planting, loosen the soil to improve air circulation and drainage. If your soil retains too much water, mix in organic compost or coarse sand. This will prevent root rot and encourage stronger root development. Check that the soil pH is neutral to slightly alkaline, as overly acidic soil can weaken the foliage. A well-prepared soil base helps the plant establish quickly and grow vigorously. Step 3: Follow a Smart Watering RoutineThe Silver Mist plant’s greatest strength is its drought tolerance. After planting, water regularly for the first few weeks to help roots settle. Once established, reduce watering to once every few days or only when the soil feels dry. Overwatering can damage the roots, so it’s important to let the soil dry out between waterings. In container gardens, ensure pots have drainage holes to prevent standing water. A consistent but moderate watering routine keeps the plant healthy without wasting water. Step 4: Use Mulch to Retain MoistureAdding a thin layer of mulch around the base of the plant helps maintain moisture and prevents weeds. Use organic materials like bark chips or dry leaves that complement the plant’s silver tone. Mulching also regulates soil temperature, keeping roots cool during hot days. In garden beds, spread mulch evenly but keep it slightly away from the main stem to avoid excess moisture buildup near the roots. Step 5: Prune for Shape and GrowthPruning Silver Mist plants keeps them compact and attractive. Trim away dead or damaged leaves to maintain a fresh appearance. Light pruning encourages new growth and keeps the foliage dense. Perform pruning at the start of the growing season to shape the plant and remove old stems. Always use clean, sharp scissors to prevent infection. Avoid heavy cutting, as gentle trimming is enough to stimulate healthy regrowth. Step 6: Feed Lightly for Healthy FoliageSilver Mist plants don’t require heavy feeding. Use a balanced, slow-release fertilizer once during early spring to boost growth. If planted in nutrient-rich soil, additional feeding may not be necessary. Over-fertilizing can cause excessive leaf growth that weakens the plant’s natural shape. A light, seasonal feed keeps the silver leaves vibrant and the plant strong throughout the year. Step 7: Protect from Pests and Excess MoistureAlthough Silver Mist plants are hardy, they can occasionally attract aphids or mealybugs. Inspect leaves regularly and use a mild organic spray if pests appear. Proper airflow and sunlight minimize pest risks naturally. Avoid excessive watering, as damp conditions invite fungal growth. With basic hygiene and careful watering, your Silver Mist plants will remain healthy and free from common garden issues. Design Ideas for Silver Mist GardensThe Silver Mist plant’s silvery foliage pairs beautifully with colorful flowers and green shrubs. Use it as a border plant to frame garden paths or as a contrast element among bright blooms like marigolds, petunias, or lantanas. For a soothing theme, combine Silver Mist with white, blue, or lavender flowers. In containers, mix it with trailing plants to create a layered, textured look. Its soft tones and reflective surface also make it an ideal choice for modern minimalist gardens. Why Bhoomi Nursery Recommends Silver Mist PlantsAt Bhoomi Nursery, we love introducing gardeners to plants that are both stunning and sustainable. The Silver Mist plant fits perfectly into our philosophy of easy-care greenery that elevates any space. We provide high-quality, nursery-grown Silver Mist plants that adapt beautifully to various conditions across India. Whether you are designing a home garden, commercial landscape, or balcony space, our team ensures you get the healthiest plants and expert guidance for lasting success. Conclusion: Elegant Simplicity That LastsCaring for Silver Mist plants is easy, rewarding, and suitable for gardeners of all experience levels. Their low-water needs, graceful appearance, and natural adaptability make them timeless favorites for eco-friendly landscaping. With simple care and thoughtful placement, Silver Mist plants transform ordinary spaces into serene, stylish gardens. With Bhoomi Nursery, you can bring home these silvery beauties and enjoy greenery that truly stands the test of time.

How to Care for Silver Mist Plants: Easy Tips for Every Gardener Read More »

Desert Bloom Plants You’ll Love: Low-Water Beauties for Every Garden

Discovering the Beauty of Desert Bloom PlantsDesert bloom plants are nature’s way of proving that beauty can thrive even in the harshest conditions. These resilient plants flourish in dry climates, adding vibrant colors and life to arid landscapes where most vegetation struggles to survive. Whether you live in a dry region or simply want a low-maintenance, eco-friendly garden, desert bloom plants bring texture, color, and a sense of tranquility to any outdoor space. Their ability to conserve water while producing stunning blossoms makes them perfect choices for modern sustainable gardening. Why Choose Desert Bloom Plants for Your GardenThe biggest advantage of desert bloom plants is their exceptional drought tolerance. They require minimal water, thrive in full sunlight, and resist many pests that affect regular garden plants. By choosing these hardy species, gardeners can save both time and resources while creating gardens that stay green and colorful year-round. These plants also enrich the soil with organic matter and help reduce erosion, making them ideal for both decorative and environmental purposes. From small balconies to large landscapes, desert bloom plants offer beauty with minimal upkeep. Step 1: Select the Right Desert Bloom PlantsWhen planning your desert bloom garden, begin with plant selection. Choose species that adapt well to your region’s climate and soil. Popular choices include succulents like agave and aloe, flowering plants such as desert marigold, and hardy shrubs like lantana or oleander. For a splash of color, add bougainvillea, which flourishes with little water but delivers bold, radiant flowers throughout the year. Cacti varieties such as golden barrel or prickly pear also make excellent additions that blend structure with style. Step 2: Prepare the Soil for SuccessGood soil preparation ensures healthy roots and vibrant growth. Desert bloom plants prefer well-drained, sandy or gravelly soil. If your garden has heavy clay soil, mix in sand or organic compost to improve drainage. These plants dislike waterlogged conditions, so proper soil texture is crucial. Before planting, clear weeds and debris, then dig holes twice as wide as the root ball. Once planted, press the soil gently around the base to eliminate air pockets. Step 3: Provide Smart Watering and SunlightEven though desert bloom plants are low-water species, they still need proper hydration during their establishment phase. Water deeply once or twice a week for the first few months to help roots develop. Once established, reduce watering frequency, allowing the soil to dry between sessions. Morning watering works best because it prevents evaporation loss. Position your plants where they receive at least six hours of direct sunlight daily, as most desert species love the sun and rely on it for blooming. Step 4: Add Mulch and Manage TemperatureMulching is an essential part of maintaining a desert bloom garden. A layer of gravel or organic mulch helps regulate soil temperature, reduces weed growth, and conserves moisture. Choose natural materials like crushed stones, pebbles, or bark chips that complement your landscape design. This simple step not only enhances the garden’s visual appeal but also creates a microclimate that supports healthy plant development throughout the year. Step 5: Maintain and Prune for Continuous BloomDesert bloom plants are naturally low-maintenance, but occasional care ensures continuous flowering. Remove dead leaves or faded blooms to encourage new growth and maintain a tidy appearance. Prune overgrown branches to shape the plants and improve airflow. For flowering varieties, trim after the blooming season to prepare them for the next cycle. Feeding once a year with a slow-release fertilizer during early spring promotes stronger root systems and brighter flowers without overstimulating growth. Step 6: Combine Colors and Textures for ImpactA desert bloom garden is more than just plants—it’s about creating visual harmony through color and texture. Combine green succulents with vibrant flowering plants to achieve contrast and balance. Pair tall cacti with low-growing ground covers to build layers that draw attention naturally. Add decorative rocks, driftwood, or clay pots to bring an authentic desert aesthetic to your garden. With thoughtful arrangement, your desert bloom space will look elegant, modern, and inviting. The Eco-Friendly Edge of Desert Bloom PlantsBeyond their beauty, desert bloom plants contribute to sustainability. They require less water than traditional garden plants, making them ideal for areas prone to drought. Their deep root systems stabilize soil, support local pollinators, and reduce the carbon footprint of gardening. By planting desert bloom varieties, you conserve water resources while supporting biodiversity—a perfect blend of ecological responsibility and aesthetic appeal. Why Bhoomi Nursery Recommends Desert Bloom PlantsAt Bhoomi Nursery, we believe every garden should be both beautiful and sustainable. Our range of desert bloom plants is carefully selected to thrive in India’s warm climate while offering year-round visual charm. From colorful blooms to sculptural succulents, each plant embodies resilience and elegance. Whether you’re designing a residential garden, a commercial landscape, or a cozy terrace space, our team provides expert advice to help you create the perfect desert-inspired green haven. Conclusion: Bringing Life to Dry SpacesDesert bloom plants prove that with the right choices, even the driest garden can become a vibrant oasis. Their unmatched resilience, low-water needs, and striking appearance make them must-haves for anyone seeking beauty with sustainability. With careful planning, minimal maintenance, and expert guidance from Bhoomi Nursery, you can transform any space into a living work of art that thrives in harmony with nature.

Desert Bloom Plants You’ll Love: Low-Water Beauties for Every Garden Read More »

Pruning an Apple Tree the Right Way: Step-by-Step Care Guide

Understanding Why Pruning MattersPruning an apple tree is more than just shaping its branches; it’s about creating a healthy structure that encourages growth, improves fruit quality, and prolongs the tree’s life. A well-pruned apple tree receives ample sunlight and air circulation, which reduces the risk of disease and supports strong, fruitful branches. Whether you’re nurturing a young apple tree or maintaining a mature one, understanding how and when to prune is key to getting abundant, juicy apples year after year. The Best Time to Prune an Apple TreeTiming is crucial when pruning an apple tree. The best time to prune is during late winter or early spring when the tree is still dormant but before new growth starts. Pruning during dormancy helps the tree heal faster and prevents excessive sap loss. Avoid pruning during autumn because cuts made before winter can invite frost damage and disease. Summer pruning can be done lightly to control shape or remove unwanted shoots, but major cuts should always wait until the dormant season. Step 1: Gather the Right ToolsBefore you begin, having the proper tools will make pruning smoother and safer. Use a pair of sharp pruning shears for small branches, a pruning saw for thicker limbs, and loppers for medium-sized cuts. Always disinfect your tools with alcohol or a mild bleach solution before and after pruning to prevent the spread of disease between cuts or trees. Step 2: Identify Dead or Diseased WoodStart by inspecting the entire tree carefully. Look for dead, diseased, or damaged branches—they often appear dry, brittle, or darker in color. Removing these branches is your first step because they no longer contribute to the tree’s health and can spread infections. Cut them back to healthy wood, ensuring your pruning angle is clean and slightly slanted to allow water to run off easily. Step 3: Remove Crossing and Competing BranchesNext, identify branches that cross over or rub against each other. These create wounds over time and invite disease. Choose the stronger or better-positioned branch and remove the weaker one. Also, eliminate vertical shoots or water sprouts that grow straight upward—they consume energy but rarely bear fruit. By opening up the canopy, you allow better light penetration, which is essential for even fruit development and vibrant leaves. Step 4: Shape the Tree for Balanced GrowthWhen shaping your apple tree, aim for an open, vase-like structure with well-spaced limbs that spread outward. This design maximizes airflow and sunlight, both crucial for fruiting. Focus on establishing a strong central leader or, for certain varieties, an open-center form where the middle is free of dense branches. Always cut just above an outward-facing bud to encourage new growth that spreads naturally away from the center. Step 5: Manage Tree Height and DensityApple trees can grow quite tall, but excessive height makes harvesting and maintenance difficult. Shorten the top branches slightly to control the height while maintaining the natural shape. Avoid removing more than one-third of the tree’s overall growth in a single season—too much pruning can shock the tree and slow down its recovery. Consistent, moderate trimming each year leads to stronger, more balanced growth. Step 6: Encourage New Fruiting WoodApple trees bear fruit on spurs—short, stubby branches that develop on older wood. During pruning, leave healthy fruiting spurs intact and remove only the overcrowded or unproductive ones. Light thinning helps the tree direct energy toward producing bigger, juicier apples rather than many small ones. Over time, regular pruning keeps fruiting wood young and productive. Step 7: Clean Up and Monitor Tree HealthAfter pruning, remove all fallen branches, leaves, and debris around the base of the apple tree. This prevents pests and fungal diseases from spreading. Apply a thin layer of mulch to retain soil moisture, regulate temperature, and discourage weeds. Avoid piling mulch directly against the trunk—leave a small gap to keep the bark dry. Finally, water the tree deeply after pruning to help it recover and promote healthy new growth. Common Pruning Mistakes to AvoidOne of the biggest mistakes is over-pruning, which stresses the tree and reduces fruit yield. Another common error is leaving large stubs or rough cuts that don’t heal properly, allowing disease to enter. Always make smooth cuts close to the branch collar without damaging it. Never top an apple tree by cutting across the main trunk—this weakens the tree and leads to poor structure and uneven regrowth. Long-Term Benefits of Proper PruningConsistent and correct pruning ensures your apple tree stays healthy, well-shaped, and highly productive. It promotes better air flow, sunlight exposure, and fruit quality. Over time, a properly pruned apple tree not only produces more fruit but also requires less maintenance. For nurseries like Bhoomi Nursery, where quality and long-term growth matter, understanding the right way to prune is essential for healthy, market-ready apple trees that thrive in various climates and soils.

Pruning an Apple Tree the Right Way: Step-by-Step Care Guide Read More »

The Desert Bloom Plant That Survives Heat and Still Looks Stunning

Why This Hardy Beauty Thrives Where Most Plants Struggle Extreme heat and dry weather often make gardeners worry about plant survival. Many plants wilt lose colour or stop growing under harsh sunlight but the Desert Bloom Plant stands strong even when water is scarce. This plant brings life to open spaces where ordinary plants fail. At Bhoomi Nursery we have seen how the Desert Bloom Plant surprises beginners and experts alike by staying fresh in hot conditions with very little care. It grows with endurance elegance and a natural shine that makes landscapes look alive throughout the year. For people who want beauty without high maintenance this plant fits perfectly. How the Desert Bloom Plant Adapts to Dry Indian Weather The speciality of the Desert Bloom Plant lies in its ability to store moisture and handle summer heat better than many ornamental species. Its foliage structure reduces water loss and protects the plant during long sunny days. At Bhoomi Nursery we guide customers who live in high temperature regions to choose the Desert Bloom Plant because it maintains colour shape and structure even during peak heat. Unlike tender flowering plants that require constant attention this plant remains composed and strong. Once it establishes roots it begins to grow steadily and becomes part of the garden zone that needs minimal effort to stay beautiful. Choosing the Right Spot for the Desert Bloom Plant Placement decides how quickly a Desert Bloom Plant grows and how well it holds its form. This plant loves sunlight and performs best in open bright areas that receive long hours of natural light. At Bhoomi Nursery we recommend planting it where sun exposure is direct and uninterrupted. Step 1: Select a sunny patch with loose soil. Step 2: Avoid heavy shade that slows growth. Step 3: Give space for air circulation. These small considerations help the plant adapt faster and maintain its distinct appearance. The Desert Bloom Plant becomes more impressive when light reaches the full spread of its leaves. Soil and Watering Needs for a Stress Free Growing Experience The Desert Bloom Plant appreciates soil that drains quickly and remains dry between watering routines. Overwatering slows growth while moderate watering encourages strength. At Bhoomi Nursery we teach beginners to water only when the top surface feels dry. Step 1: Touch test for dryness. Step 2: Water lightly and evenly. Step 3: Allow soil to breathe. Sandy or slightly rocky soil suits this plant and prevents root rot. When placed in soil that drains well the Desert Bloom Plant stays active without daily care. This makes it ideal for gardeners who cannot water frequently but still want greenery around their homes. Why the Desert Bloom Plant Works Well in Modern Landscape Design Modern gardens favour plants that look bold yet subtle. The Desert Bloom Plant has a sculptural presence that makes landscapes look neat and intentional. It suits minimalist pathways rock gardens courtyard layouts and commercial open grounds. At Bhoomi Nursery many landscapers prefer this plant because it maintains shape well and does not require constant trimming. It fills dull corners with character and creates a strong contrast beside lawns palms or other structured plants. Its resilience reduces maintenance cost which makes it ideal for large outdoor projects in heat prone locations. Desert Bloom Plant as a Long Term Garden Investment A landscape becomes satisfying when plants last for years without constant replacement. The Desert Bloom Plant matures slowly but retains strength season after season. Once rooted properly it stands through heat waves uneven watering and rough sunlight. At Bhoomi Nursery we have provided this plant to institutions public spaces and home gardens where durability matters more than fast growth. The plant grows as a one time investment that continues to enhance outdoor appearance steadily. Its structure remains firm throughout the year making it a lasting addition to any garden design. Simple Maintenance Habits for Healthy Growth Even strong plants respond well to steady care. The Desert Bloom Plant remains at its best when basic habits are followed. Step 1: Remove dry leaves occasionally. Step 2: Avoid overwatering during cooler months. Step 3: Apply light nutrition once or twice a year. At Bhoomi Nursery we explain maintenance in simple terms so even new gardeners feel confident. This plant does not demand constant attention yet appreciates periodic support. When cared for thoughtfully it becomes greener fuller and more graceful across seasons. Why Bhoomi Nursery Recommends the Desert Bloom Plant for Hot Regions Many regions in India face extreme temperatures and water limitations which makes plant selection crucial. The Desert Bloom Plant stands out as one of the best solutions for such climates. At Bhoomi Nursery we help customers choose healthy plants that are already adapted to strong light and low moisture so growth after planting becomes smoother. We also recommend pot selection spacing methods and care routines based on location. With correct planning the Desert Bloom Plant turns into a reliable beauty that holds the garden together even in intense summer months. Conclusion A Plant That Combines Strength and Visual Elegance Not all plants can endure heat and still look fresh but the Desert Bloom Plant does exactly that. It offers natural charm steady endurance and a modern desert like appeal that feels refreshing and powerful. At Bhoomi Nursery we trust this plant for spaces that need greenery without constant care. Whether you are building a residential garden designing a commercial property or improving open outdoor land the Desert Bloom Plant stands as a smart long term choice. With its calm presence and heat tolerance it continues to look stunning through every season.

The Desert Bloom Plant That Survives Heat and Still Looks Stunning Read More »

Everything You Should Know Before Planting Your First Apple Tree

Why Apple Growing Starts With Understanding the Plant First Planting an Apple Tree is an exciting decision because it brings the promise of fresh fruit shade scenic beauty and a long term garden companion. Many beginners imagine the harvest but true success begins much earlier. It starts with understanding how the tree grows what it needs and how you can give it the right start. At Bhoomi Nursery we often meet first time growers filled with enthusiasm but unsure where to begin. This guide helps you prepare confidently and understand what truly matters before an Apple Tree goes into the soil. Selecting the Right Apple Tree Variety for Your Region Not every Apple Tree thrives in every climate so selection plays the biggest role in future success. Some varieties need cooler regions while others adapt well to warmer Indian climates. At Bhoomi Nursery we help customers pick varieties based on temperature rainfall and location. A tree suited for your area produces better fruit size better sweetness and healthier foliage. Before planting your Apple Tree check winter chill hours local weather swings and rainfall pattern to match the variety with your land. The right choice at the beginning removes most difficulties later. Choosing the Right Planting Spot for an Apple Tree Like all fruit trees the Apple Tree requires sunlight space and well draining ground. A shaded location restricts growth and limits fruit production. Soil that holds water damages roots and creates fungal issues. At Bhoomi Nursery we recommend planting where the tree receives six to eight hours of sunlight daily. Select open areas away from tall buildings or dense trees that block light. An Apple Tree also needs space to spread its canopy so avoid planting too close to walls or pathways. Planning the location correctly sets a strong foundation that allows steady seasonal growth. Soil Preparation Before Planting an Apple Tree Good soil structure helps the Apple Tree root deeply and draw nutrients efficiently. Heavy clay soil slows growth while loose fertile soil supports healthy roots. At Bhoomi Nursery we guide growers to prepare soil by mixing compost sand and topsoil in balanced proportion. Step 1: Loosen the planting area. Step 2: Add organic compost. Step 3: Ensure drainage without leaving soil too sandy. This natural blend allows moisture to stay without suffocating roots. A well prepared pit improves early establishment and makes the tree stronger in the first year. How to Plant an Apple Tree the Right Way Planting technique matters as much as soil and variety selection. A deep hole slows growth while a shallow one exposes roots to dryness. At Bhoomi Nursery we teach a method that keeps the young Apple Tree safe. Dig a hole slightly deeper than the root ball place the sapling upright backfill loosely around the roots and water slowly to remove air pockets. Support the tree with a stake if the area receives strong wind. The first two months are sensitive so soil moisture should stay stable but never waterlogged. Once the tree settles new leaves and stronger stem structure begin to show. Watering and Feeding for a Healthy Apple Tree An Apple Tree needs balanced watering for root growth fruit development and foliage density. Over watering weakens roots while underwatering slows growth. The goal is steady moisture. Step 1: Water deeply but not often. Step 2: Allow the upper soil to dry slightly. Step 3: Increase watering in extreme heat. At Bhoomi Nursery we also recommend feeding the tree with mild organic manure at regular intervals. Compost and well aged cow manure improve flowering and fruit set naturally. Too much fertilizer creates foliage without fruit so moderation is essential. Pruning and Training the Tree for Better Fruit Production Pruning shapes the structure of an Apple Tree and increases fruit bearing capacity. Without pruning branches grow randomly shade each other and reduce airflow. At Bhoomi Nursery we show beginners how to prune only the dry branches crossing branches or weak shoots. Early pruning allows the tree to develop a strong central trunk with balanced branches spreading outward. Good air circulation reduces pests improves light penetration and increases flower and fruit formation. Once pruning becomes routine the tree stays healthy and looks attractive through every season. Pollination and Fruit Setting Understanding the Basics Many Apple Tree varieties require a second apple variety for proper pollination. Without compatible pollination flowers bloom beautifully but fruits remain few. At Bhoomi Nursery we guide buyers to plant two compatible varieties together if their region demands cross pollination. Bees wind and insects play a major role in pollination so gardens with flowering plants nearby often show better fruiting. Sometimes a single self fruitful variety is enough but checking this detail before planting prevents disappointment after the first bloom. Common Apple Tree Challenges and How to Handle Them Every plant faces natural challenges and the Apple Tree is no exception. Fungal spots may appear in wet weather leaf curl may show after stress or aphids may gather on tender shoots. At Bhoomi Nursery we encourage early observation rather than late repair. Step 1: Watch leaves weekly. Step 2: Remove affected parts. Step 3: Maintain aeration and sunlight. Most early problems resolve naturally when airflow improves and watering remains balanced. A strong tree resists issues better which is why healthy soil sunlight and good planting practice matter more than quick fixes. Why Buying Your Apple Tree From Bhoomi Nursery Makes a Difference The success of an Apple Tree begins at its starting point. A strong sapling survives heat wind pests and transplant stress better than a weak one. At Bhoomi Nursery each sapling is nurtured with proper spacing watering and soil support so it develops a strong root system before reaching your garden. You also receive guidance on placement pruning watering and fruiting expectations so the journey becomes easier even for beginners. When you plant confidently your tree responds with stronger growth and healthier future yield. Conclusion A Well Planned Start Makes Apple Growing a Joy Planting an

Everything You Should Know Before Planting Your First Apple Tree Read More »

Plant Care Tips Every Beginner Should Know Before Growing More Plants

Why Starting With the Right Basics Helps Plants Grow Strong Growing plants for the first time feels exciting but also uncertain when you are not sure how to begin. A small plant can flourish beautifully when it receives the right guidance from the start. This is why learning essential care habits builds confidence and keeps your plants healthy. At Bhoomi Nursery we help first time gardeners understand how simple daily attention creates big results over time. You do not need complex tools or experience. You only need patience observation and the willingness to learn. With the right approach your plants respond with new leaves strong roots and visible growth that makes you feel proud. Plant Care Tips for Choosing the Right Plant Before You Start The first step in successful gardening begins with selection. Not all plants suit every space and environment. Some plants love the sun while others thrive in shade. At Bhoomi Nursery we guide beginners to choose plants based on their space because plant success depends on placement. Small indoor areas do well with air purifying greens while balconies and gardens handle flowering or outdoor shrubs better. When you start with plants that match your space you reduce mistakes and enjoy faster visible growth. Choosing wisely is the foundation of healthy gardening and one of the most important Plant Care Tips to remember. Plant Care Tips for Watering the Right Way Without Overdoing It Watering is the most common concern for beginners. Too little water dries roots too much water suffocates them. Balanced watering keeps plants happy. At Bhoomi Nursery we teach new plant owners to check soil before watering. Step 1: Touch the soil with your fingers. Step 2: If the top layer is dry water gently. Step 3: Allow excess water to drain so roots stay strong. Consistent watering builds rhythm and helps plants remain active throughout the week. This is one of the most valuable Plant Care Tips because water is life for every plant yet needs control rather than frequency. Plant Care Tips for Sunlight and Placement in Home and Garden Sunlight decides how quickly a plant grows. Direct harsh sun may burn sensitive leaves while too little light slows growth. Each plant prefers its own light condition. At Bhoomi Nursery we help customers place plants near windows balconies or shaded outdoor spots depending on their light needs. Sun loving plants enjoy bright corners while delicate indoor greens prefer filtered light. Observing leaf colour shape and direction tells you what your plant needs. Light correction often solves most plant issues which is why sunlight guidance stands strong among essential Plant Care Tips for beginners. How Soil Quality and Nutrition Support Healthy Root Development Healthy plants begin with healthy roots and roots grow only when the soil supports them. Good garden soil must feel light airy and not too tight. At Bhoomi Nursery we encourage beginners to use soil that drains well but still retains moderate moisture. Mixing compost cocopeat and garden soil gives structure and nutrients. If the soil becomes hard water cannot reach roots. Loose soil encourages growth and reduces risk of root rot. When roots breathe well plants grow naturally stronger which makes good soil selection one of the central Plant Care Tips every beginner should practice early. Pruning Repotting and Basic Maintenance to Keep Plants Fresh Plants grow like living art and sometimes they need shaping to continue growing well. Pruning removes dry or old leaves so new growth can appear. Repotting becomes necessary when roots outgrow their container. At Bhoomi Nursery we keep the process simple for beginners. Step 1: Trim brown or damaged leaves. Step 2: Repot when roots show outside the pot. Step 3: Add fresh soil and water lightly. This kind of maintenance keeps your plants young active and free of stress. Regular attention helps plants breathe better and respond beautifully. Observing Plants Daily Helps You Learn Faster Plants communicate through their leaves stem strength and colour. When you observe daily you notice changes quickly. A yellow leaf may indicate low nutrition or excess water. Dry tips may indicate heat stress. Slow growth may mean insufficient light. At Bhoomi Nursery we train beginners to watch their plants instead of rushing to fix everything at once. Observation is the final yet most powerful among Plant Care Tips because it creates understanding over time. The more you notice the more you learn what each plant needs. Why Bhoomi Nursery Is the Right Place to Begin Your Gardening Journey Starting your plant journey becomes easier when you learn from experienced hands. At Bhoomi Nursery we support beginners with plant selection watering habits repotting advice and environment based recommendations. We help you understand the personality of each plant so you grow confidently instead of guessing. Whether you want indoor plants outdoor greenery or flowering shrubs our guidance ensures that you care for them correctly from day one. With the right structure and the right habits your plants will flourish and your confidence will grow. Conclusion A Little Guidance Makes Every Plant Grow Better Plant care is not complex when you follow simple clear habits. Balanced watering correct sunlight loose soil gentle pruning and daily observation help beginners grow successfully without confusion. At Bhoomi Nursery we have watched many first time growers become confident plant lovers with just a few strong basics. When you start slow and learn step by step your plants reward you with fresh leaves and steady growth. These Plant Care Tips give you the foundation to grow more plants in future with knowledge and joy.

Plant Care Tips Every Beginner Should Know Before Growing More Plants Read More »

Discover the Natural Charm of the Foxtail Palm for Indian Gardens

Why This Palm Brings Balance Beauty and Strength to Outdoor Spaces Indian gardens today are shifting toward plants that offer structure elegance and long term value. The Foxtail Palm stands out as one of the most graceful choices for this need. Its smooth trunk feather like fronds and balanced height create a clean and modern look that appeals to homeowners and landscapers alike. At Bhoomi Nursery we have watched the Foxtail Palm become a favourite for gardens across Andhra Pradesh because it brings a tropical touch without demanding complicated care. Its presence instantly softens spaces and adds a refreshing flow to both small and large landscapes. How the Foxtail Palm Enhances Garden Design Naturally A key reason gardeners choose the Foxtail Palm is its natural ability to uplift the surroundings. The plant grows with a gentle uniform structure and the fronds curve outward in a soft arch that creates movement in the space. At Bhoomi Nursery customers often select the Foxtail Palm for pathways entrances and lawns because it offers a clean silhouette and blends with modern and traditional settings. Its fronds resemble a fox’s tail giving the plant a graceful rhythm that catches the light beautifully. Whether planted alone or in a cluster the Foxtail Palm brings proportion warmth and personality to the landscape. Understanding the Growth Pattern of the Foxtail Palm The Foxtail Palm grows at a steady pace with a single trunk that becomes smooth and light coloured over time. This trunk supports dense fronds that form a lush crown. At Bhoomi Nursery we help customers understand the natural growth rhythm of the Foxtail Palm so they can plan their garden layout effectively. The plant grows best in open sunny spots where it receives enough light to maintain its vibrant fronds. With proper spacing it can grow into a strong landscape feature that lasts for many years. Because the Foxtail Palm maintains a neat shape it fits well in residential gardens resorts commercial spaces and premium real estate projects. Why the Foxtail Palm Thrives in Indian Climate Conditions One of the greatest strengths of the Foxtail Palm is its ability to adapt to Indian weather. It tolerates heat and humidity well and performs reliably in sunny regions. At Bhoomi Nursery we recommend the Foxtail Palm to customers who want a hardy palm that does not struggle with temperature variations. Once established it becomes drought tolerant and handles seasonal shifts with ease. This makes the Foxtail Palm a practical choice for people who want a beautiful palm without constant attention. Its resilience ensures that the garden stays green and attractive even during harsh summers. How to Care for the Foxtail Palm With Simple Daily Practices Caring for the Foxtail Palm is simple when basic routines are followed. At Bhoomi Nursery we guide customers through the easiest way to keep their Foxtail Palm healthy. Step 1: Provide bright sunlight for most of the day. Step 2: Water deeply but allow the soil to drain well. Step 3: Use a balanced soil mix that avoids waterlogging. These habits keep the roots strong and the fronds bright. The Foxtail Palm also benefits from occasional feeding which supports steady growth and helps maintain its rich green colour. With these practices even beginners can grow this palm successfully. How the Foxtail Palm Adds Value to Landscaping Projects Landscapers prefer trees that provide height structure and design flexibility and the Foxtail Palm meets all these needs. Its elegant crown adds character to open landscapes and its neat trunk fits well along pathways driveways and swimming pool edges. At Bhoomi Nursery we include the Foxtail Palm in many landscaping plans because it instantly enhances the visual appeal of the project. When placed in rows it forms an impressive avenue and when used as a single highlight it becomes a focal point that draws attention. The plant supports both luxury and simplicity making it useful in resorts villas commercial complexes and community parks. Why Bhoomi Nursery Recommends the Foxtail Palm for Long Term Garden Planning Every plant chosen for a garden becomes part of its identity for years to come. That is why Bhoomi Nursery carefully recommends the Foxtail Palm for customers who want a reliable and attractive tree. We nurture each palm with proper spacing controlled watering and healthy soil so it grows stronger after planting. Our team explains growth expectations placement ideas and maintenance routines based on the customer’s specific space. The Foxtail Palm becomes easier to manage as it matures which makes it a long term favourite for people who want beauty without stress. How the Foxtail Palm Contributes to a Healthier Outdoor Atmosphere Beyond its beauty the Foxtail Palm supports a fresher and cleaner outdoor environment. Its green canopy introduces calmness and softens the harshness of concrete spaces. At Bhoomi Nursery we have seen how the Foxtail Palm helps create peaceful outdoor corners where families enjoy spending time. Gardens that include this palm feel more open and relaxing and its movement in the breeze adds a soothing natural effect. This balance of design and emotional comfort is one reason the Foxtail Palm remains popular across Indian gardens. Conclusion A Palm That Brings Lasting Style and Simplicity Indian gardens benefit from plants that offer long term value beauty and comfort. The Foxtail Palm delivers all of this with a gentle yet impressive presence. Its smooth trunk its soft crown and its adaptable nature make it ideal for homes landscapes and commercial projects. At Bhoomi Nursery we trust the Foxtail Palm for its reliability and charm and we recommend it to customers who want a palm that grows gracefully through the seasons. By choosing the Foxtail Palm you bring home a timeless plant that enriches the garden keeps the surroundings fresh and stands tall as a symbol of simplicity and elegance.

Discover the Natural Charm of the Foxtail Palm for Indian Gardens Read More »